Preconfigured Slicer Settings Secret Sauce For 3D Printing Success
Slicing is a process necessary to convert a digital design to a physical device that can be 3D printed, then fitted on a patient. Advances in 3D printing have made fabricating sockets more automated. Preconfigured slicing profiles have brought 3D printing prosthetics within reach of all practices, regardless of technical experience or aptitude.
To get a deeper understanding of what a preconfigured slicing profile is and the role it plays in fabricating prosthetic devices, let’s look at what’s involved in 3D printing check sockets.
Here is a high-level view of the concept:
- Create a digital shape using CAD (Computer Aided Design) software.
- Convert shape into a 3D-printable file using CAM (Computer Aided Manufacturing) software.
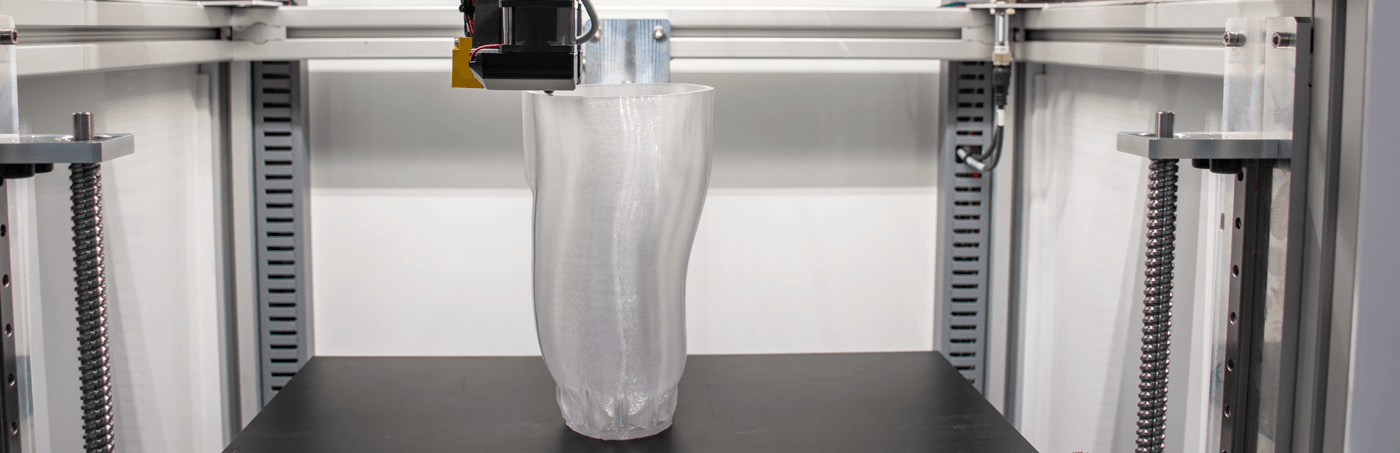
- Submit that file to a 3D printer to automatically fabricate a check socket, as designed.
CAD inputs can include patient 3D scans and measurement data. They may also include standard, commonly used shapes such as brims, posterior shelfs, and distal adapters.
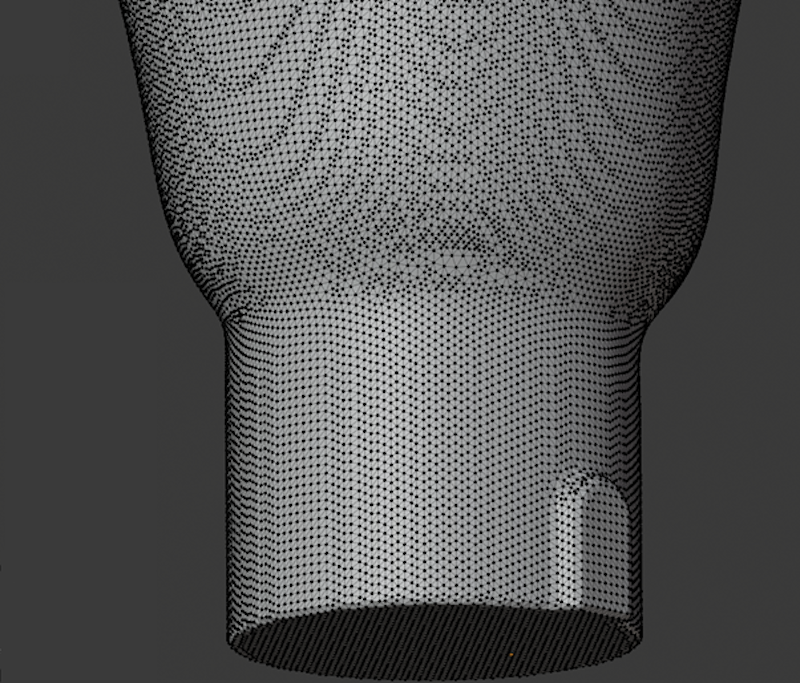
What is a Digital Shape?
A digital shape is comprised of a collection of connected points that create triangles. These triangles in turn have faces (i.e. flat surfaces) that, as a collection, approximate a shape. The more points and triangles used to define a shape, the better the approximation of the real-world shape.
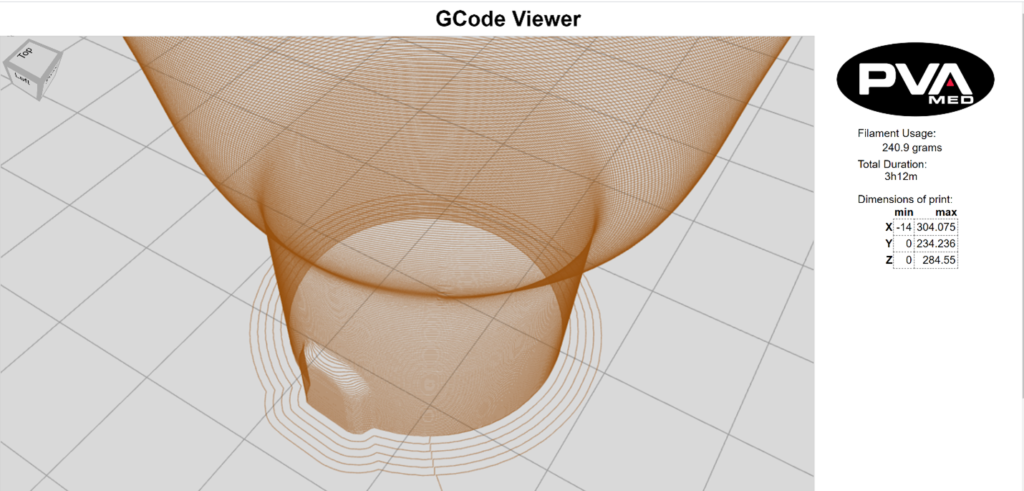
Before a digital shape can be automatically fabricated into a physical device to be fitted on a patient, that shape must be converted into instructions that a 3D Printer can interpret and process. For 3D printing, these instructions are grouped into an electronic file referred to as a G-code.
The G-code will include precise instructions telling the printer how to 3D print the shape, layer by layer. These instructions include the tool path of the heated nozzle as it travels through space and deposits material, starting on the print bed, then layer on layer.
Other instructions in the G-code set the temperature of the nozzle and print bed, the speed at which the print head moves, layer heights, fan speed, flow rate of material, and a myriad of other fabrication factors.
What is Slicing Again?
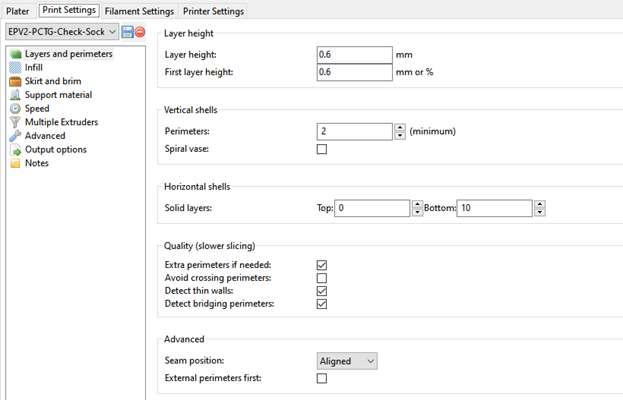
Since 3D printing fabricates the device in layers (or slices), the process of translating a digital shape to machine instructions is often referred to as “slicing.” The slicing process is always performed in CAM software called slicers. Slicers take a digital shape as input. The user then sets and/or adjusts the slicer settings which can be grouped into three categories:
- Print Settings
- Filament Settings
- Printer settings
Print settings include layer heights, shells, infill percent and type, and speed, with hundreds of advanced settings that can be tweaked to achieve the best prints possible.
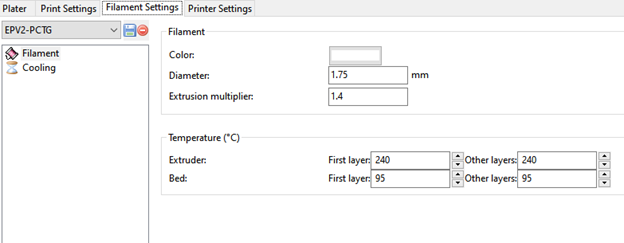
Relevant filament settings include filament diameter, extrusion multiplier, temperature of the extruder and print bed as well as cooling.
Basic printer settings include nozzle diameter, print bed shape (L x W), and Z offset.
Starting Point: Selecting the Best Material for the Application
Since virtually anything can be 3D printed, it is important to understand the requirements of the device you are trying to print, then select a material with the properties to support those requirements. In the case of prosthetic check sockets used in the prosthetic fitting process, device requirements include:
- Transparency to enable practitioners to identify pressure points and voids during the initial fitting.
- Strength to safely support patients during a dynamic fitting.
- Smooth surface on the inside of the device to provide accurate patient perception of fit.
The device requirements will always drive the material selection. In the case of check sockets, a material called PCTG (Poly – Cyclohexylenedimethylene Terephthalate Glycol) is often used based on its support of the stated requirements. Slicer settings should be set in the range of extruder and bed temperature recommendations from the filament manufacturer.
Pre-Configured Slicing Settings Secret to Success
Slicer settings are perhaps the most difficult to set as there are many choices, each with its own impact on print quality. Ideally, you can use settings provided by others already 3D printing check sockets successfully (i.e. pre-configured slicing profiles).
Without pre-configured slicing profiles, setting and adjusting print settings can be costly due to material usage, and time-consuming to test. Each change should be tested in isolation as attributing impact when changing multiple options at once is not possible.
It is hard to overstate the importance of testing these settings when adjusting, as the values of each can be the difference between print success and failure. Talk to the many practices successfully 3D printing check sockets and they will confirm.
Once successful prints are consistently achieved, those settings can be used again and again with predictable, scalable, high-quality results that can be realized every time.